In this short tutorial we gonna discuss how to use git in the development process under following topics.
- Creating a new Git repository
- Adding files to a Git repository
- Committing changes to a Git repository
- Branching, Checkout and merging
- git with remote
- Pushing and pulling changes
- Troubleshooting
Creating a New Git Repository
To create a new Git repository, you can use the git init command. This command will create a .git subdirectory in your current working directory. The .git subdirectory contains all of the metadata for your Git repository, such as the commit history and the list of branches.
git init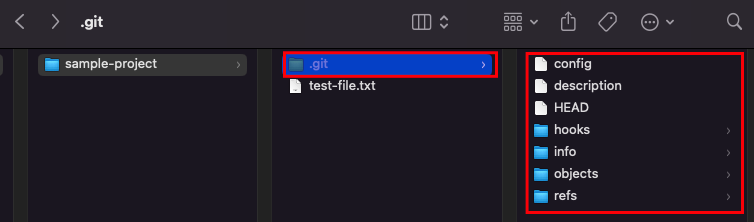
Adding Files to Git Repository
Once you have created a Git repository, you can add files to it using the git add command. This command will add the specified files to the staging area. The staging area is a temporary holding area for files that you are about to commit. For example, to add the file test-file.txt to the staging area, you would run the following command:
git add test-file.txtCommitting changes to a Git Repository
Once you have added the files that you want to commit, you can commit them to the repository using the git commit command. This command will create a new commit that records the changes that you have made.
When you commit changes, you should always include a commit message that describes the changes that you have made. The commit message should be clear and concise, and it should be helpful to anyone who needs to understand your changes.
For example, to commit the changes that you made to the file test-file.txt, you would run the following command:
git commit -m "Adding a new file test-file.txt"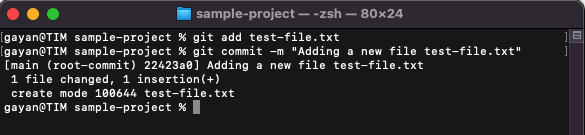
Branching, Checkout and Merging
Branches are a way to create a separate working copy of your Git repository. This can be useful for working on different features or bug fixes independently.
To create a new branch, you can use the git branch command. For example, to create a new branch called feature-branch, you would run the following command:
git branch feature-branchOnce you create a new branch you can checkout to that newly created branch using git checkout. For example checkout into the feature-branch use following command.
git checkout feature-branch
Once you are working on a branch, you can make changes to the files in that branch. When you are finished making changes you need to commit new changes to that branch. Once you commit those changes stay in that specific branch but not in other branches.

Once commit the changes, you can merge the changes back into the main branch using the git merge command. Since we merging changes back to main brach first we need to checkout into main branch.
For example, to merge the changes from the feature-branch back into the main branch, you would run the following command:
git merge feature-branch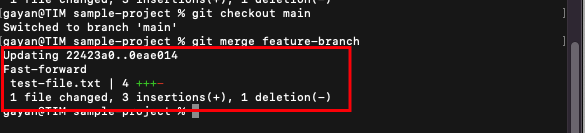
Git with Remote
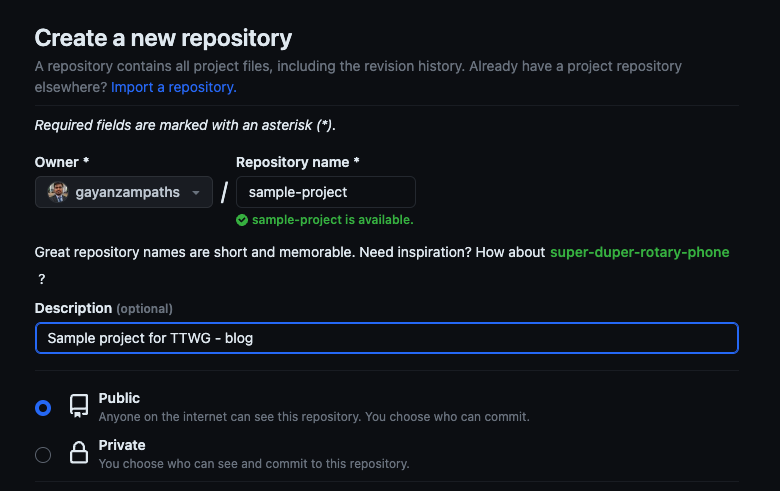
To use Git with remote, you need to first create a remote repository. A remote repository is a Git repository that is hosted on a server. You can create a remote repository on a variety of platforms, such as GitHub, GitLab, and Bitbucket. For this tutorial I created following remote repository on GitHub.
Once you create a remote repository you need to attach remote repository to your local repository. To attach remote you need to use git remote add command. once remote repository added you can push the changes to the remote repository.
For example to add the remote repository of that you created on GitHub you need to execute following command. ( Please replace your username and remote repository name )
git remote add origin https://github.com/<username>/<repository-name>.gitIn the above command we named our remote repository as origin. we can use this tag in the later in the process of call the remote repository.
Pushing and Pulling Changes
If you are working on a project with other people, you will need to share your changes with them. You can do this by pushing your changes to a remote repository. You can push your changes to a remote repository using the git push command.
For example, to push your changes to a remote repository called origin, you would run the following command:
git push origin main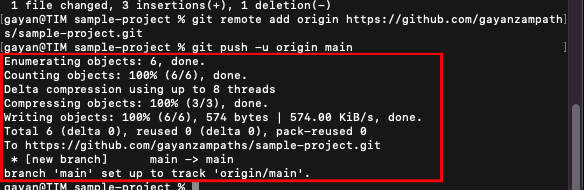
In the above screenshot I use -u flag with the git push command. That flag will create a tracking reference to the origin/main
Once you pushed the changes to the remote repository it is available to anyone that have access granted. ( If it is a public repository anyone can interact with your repository. If it is a private you can chose which people can have access to that repository. ) Those who have access can do the changes to the content of your repository. Once someone made a change and it is available in the remote repository you can fetch those changes to your local repository.
You can also pull changes from a remote repository into your local repository using the git pull command. First you need to fetch the remote changes references. To do that you need to execute git fetch command.
For example, to pull the latest changes from the remote repository called origin into your local repository, you would run the following command:
git pull origin main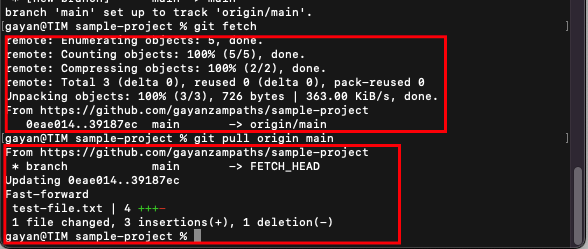
Troubleshooting
If you encounter any problems with Git, you can consult the Git documentation: https://git-scm.com/book/en/v2. You can also search for help online or comment bellow in this article.
These are just a few of the basic Git commands that you can use for daily developments. There are many other commands available, so I encourage you to learn more about Git. Git is a powerful tool that can help you to manage your code effectively. By learning how to use Git, you can save time and frustration, and you can collaborate with others more easily.